This guide will help you to record videos of your Unity project.
You can either go through from the top to the bottom of this document or directly go to the section you’re interested in.
Table of Contents
- Record your Screen
- Record directly within Unity [Preferred Method]
- Recommended Video Parameters
- References
Record your Screen
This is not the preferred method, especially for exporting a high-resolution video, but definitely can be handy when making some short #gamedev clips to share.
Windows
There’re many ways to record screen on Windows, here we show two of the most accessible ways.
Xbox Overlay
If you’re using Windows 10, simply press Windows key + G to enable Xbox gaming overlay, which allows you to record the screen. The recorded video will be in the Video folder inside your Windows user folder (C:\Users\YourName\Videos). However, you can’t record on Desktop or Windows File Explorer.
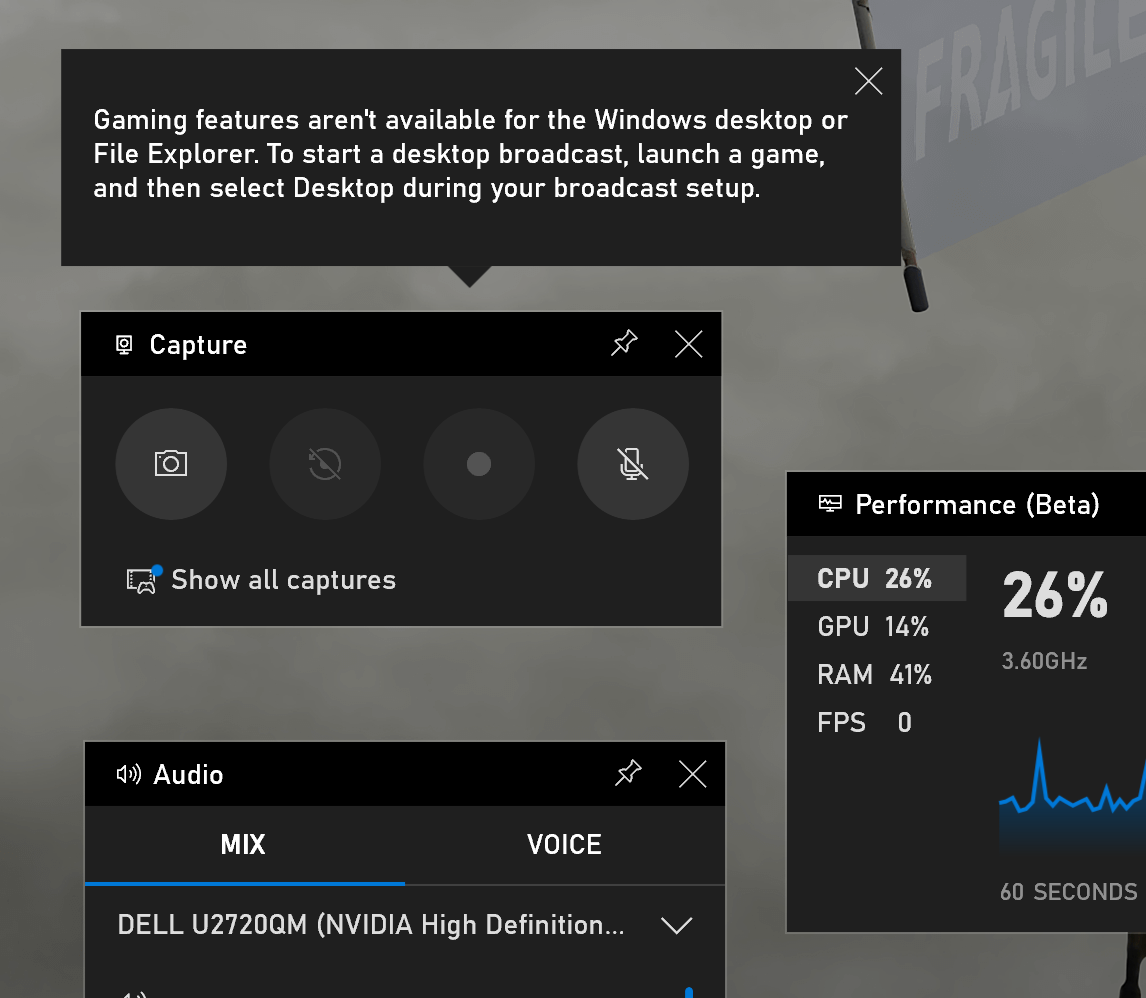
OBS
The other way is a free open-source software called OBS Studio, that you can download here https://obsproject.com/.
Note: OBS is the solution I recommend if you want to stream your #gamedev on Twitch or others.
Here shows the main window of the software.
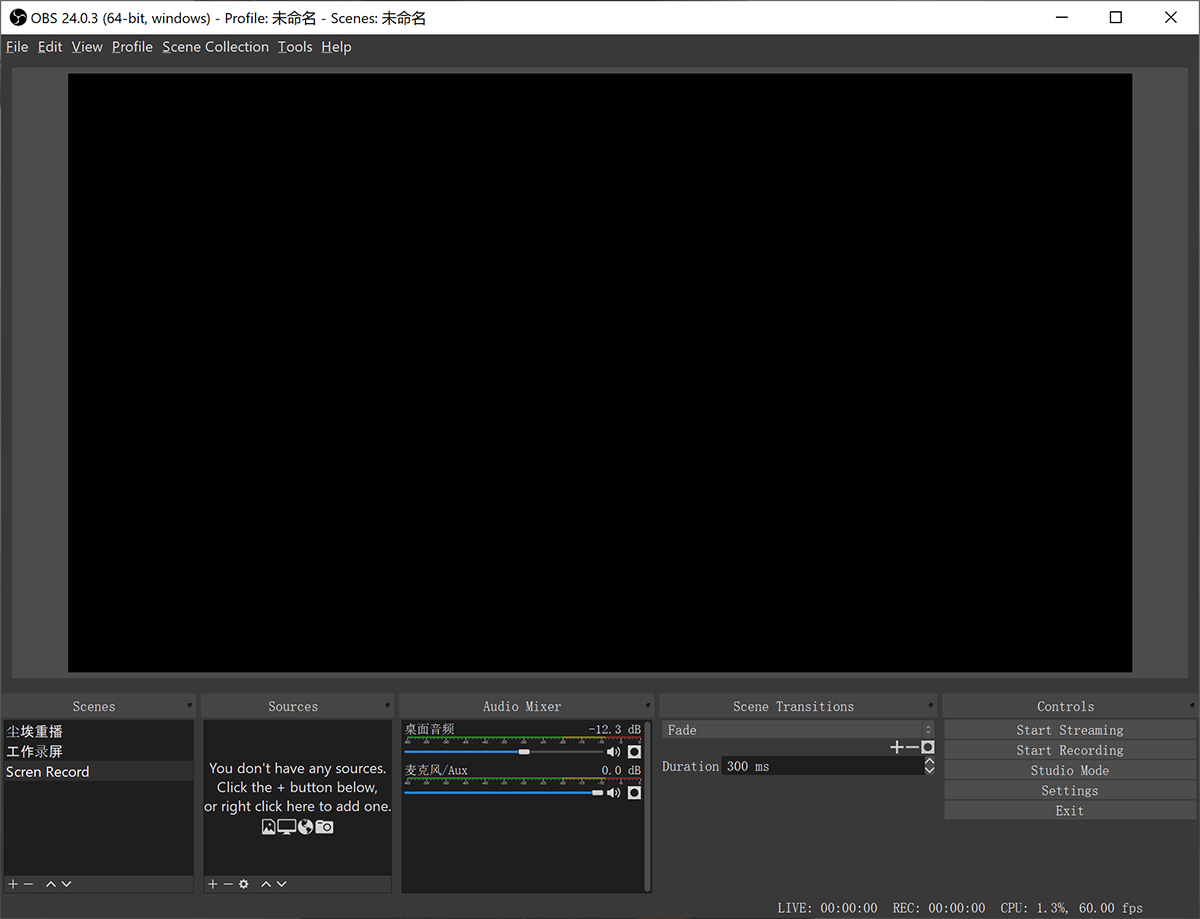
The way it records is simple: record whatever enabled in the Sources list:
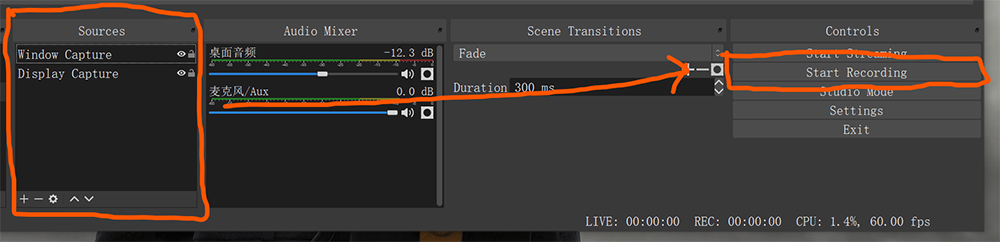
You can click the + button in the Sources area to add more source: like display, window, image, video, etc.
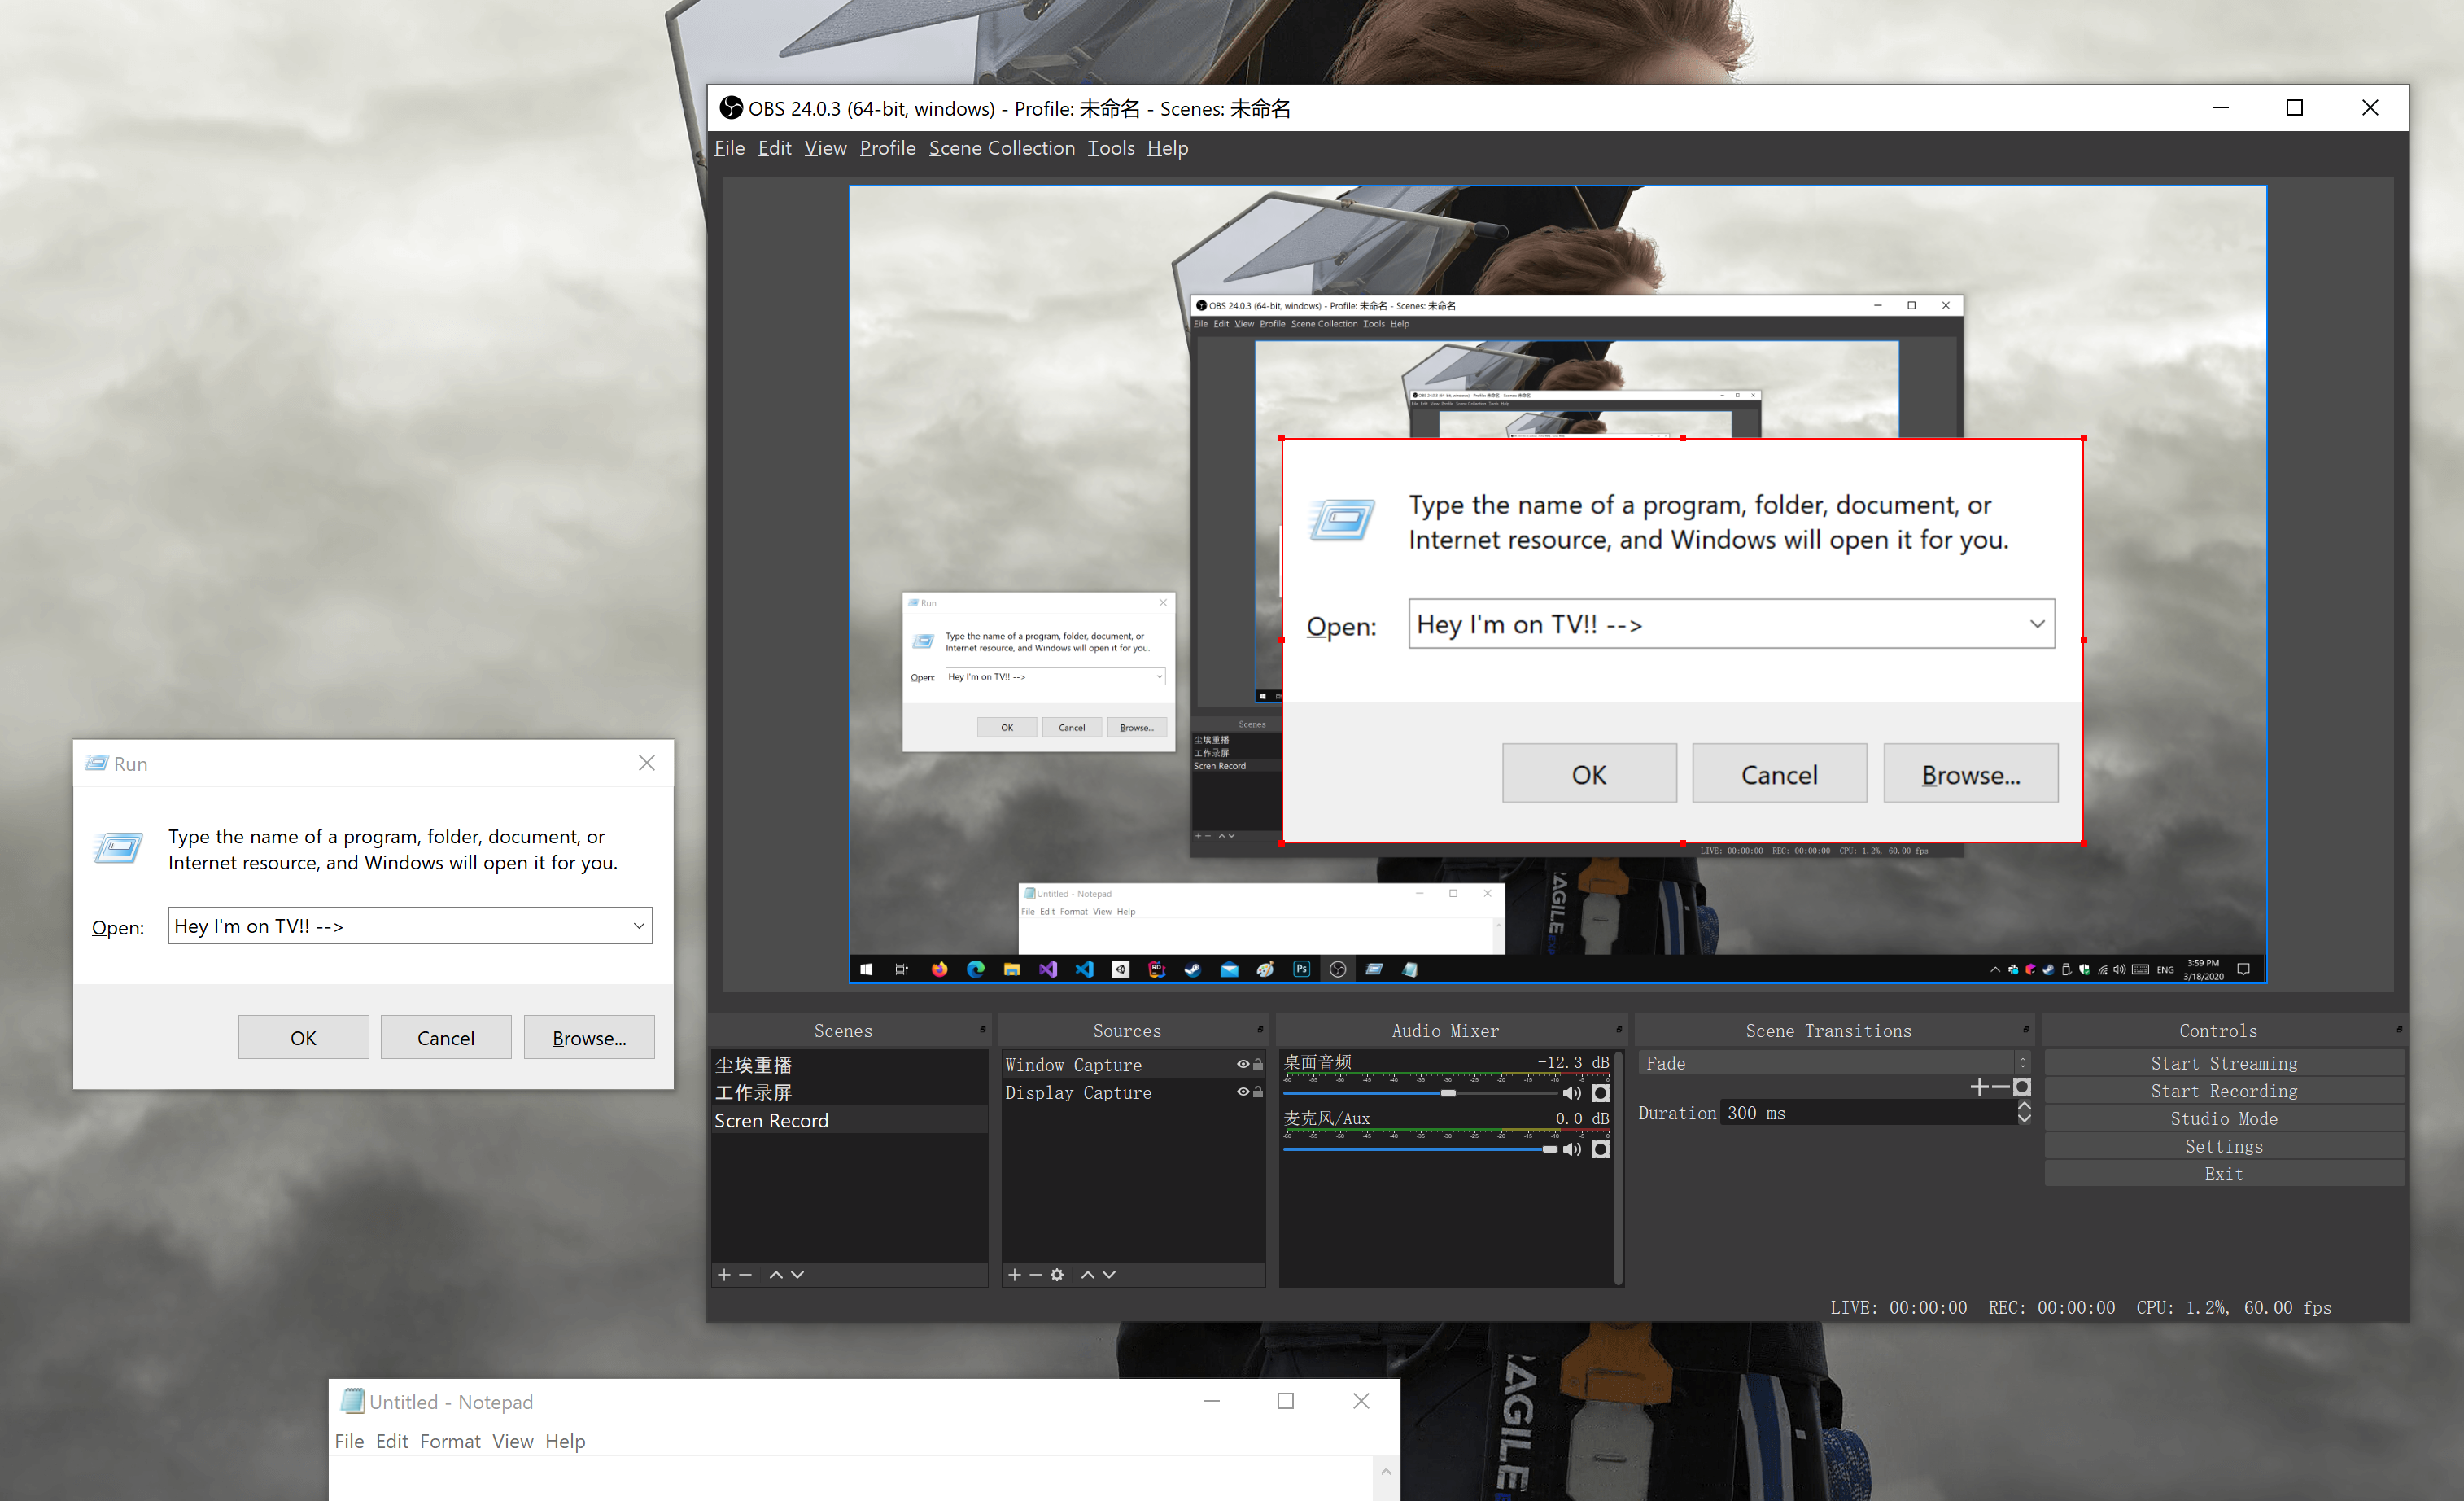
Once you added a source, you can arrange it in the top area called Canvas. You can resize these sources by dragging the red handles around the corners, you can also drag the source in the Canvas around if you like.
Here in the example, it shows I added two sources: my display and a window I picked, which is a Run window. So you will see that I zoomed the Window Capture source a larger size than it should be, and put it on a position in the Canvas. Meanwhile, because I’m capturing the exact same display so you will see my desktop infinitely looping in the OBS window.
Now you hit the Start Recording button, everything shown in the canvas will be recorded. You can access the video file by either go to the Video folder in your Windows user folder (you can specify that in the Settings) or click File -> Show Recordings.
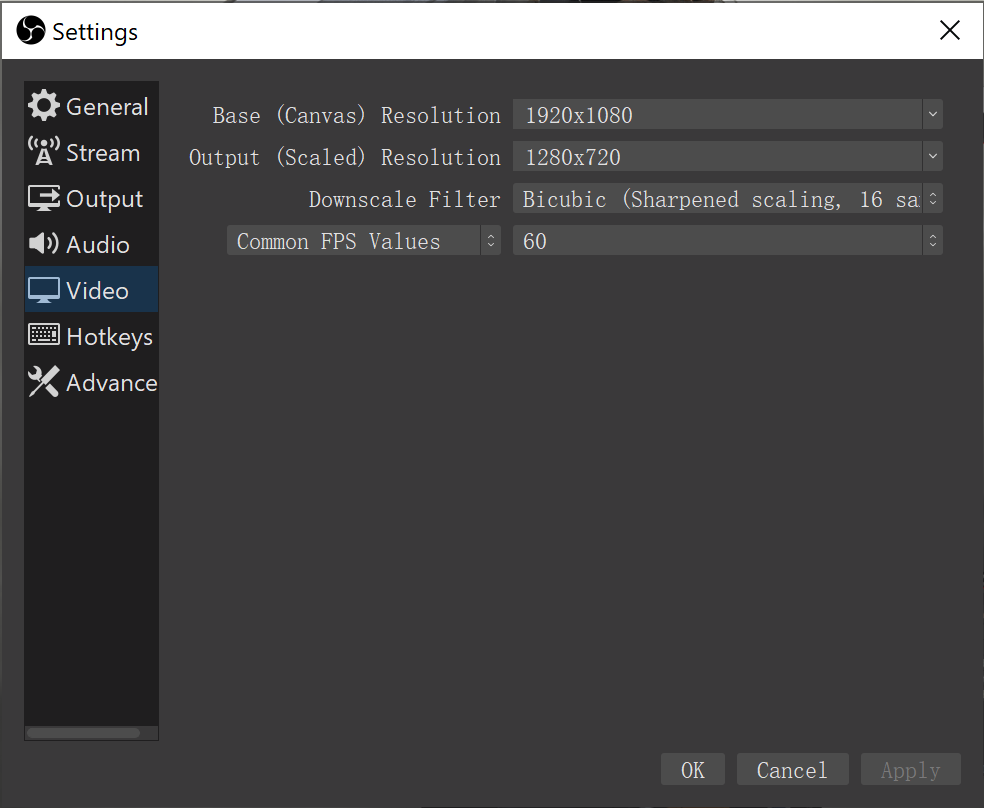
To customize the video parameter, you can click Settings and select Video. Here are two types of resolutions we can choose:
Canvas Resolution: needless to say the size of the canvas, you might want it to be the same size as your display if you want to capture the entire screen.
Output Resolution: the resolution of the video. It affects streaming as well.
Common FPS Values: frame rate. Depending on the purpose, what I recommended is either 24, 30, or 60. For more details check the Framerate section.
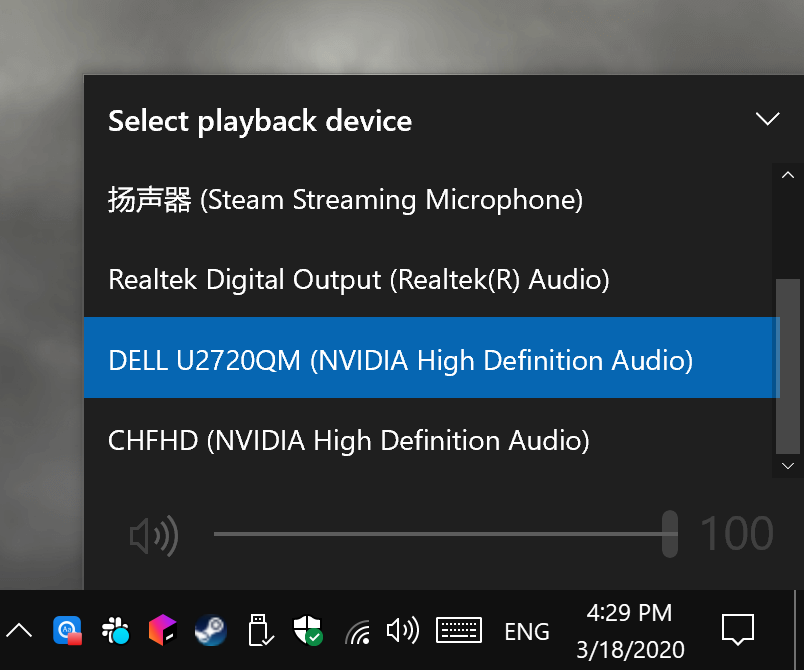
If audio is required, by default OBS sets Desktop Audio as the audio source, we could use that. Go and check the Audio section in Settings, to make sure we’re selecting the right source from the drop-down menu. Here I have my speaker plugged in the monitor so I choose my DELL monitor, so that when I play music both I and OBS will hear it.

Here shows I assign my monitor as Windows audio output.
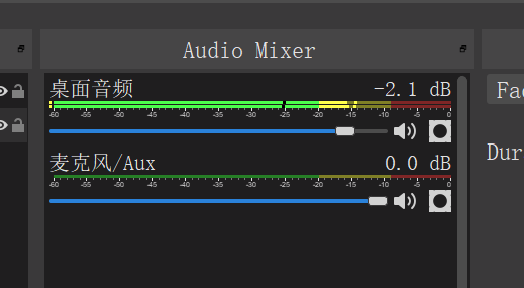
To test if it’s working, check the Audio Mixer to see if the green bars poping while playing sounds. (No idea why it shows Chinese even I switch everything to English but that exactly means Desktop Audio.)
macOS
Builtin Shortcut
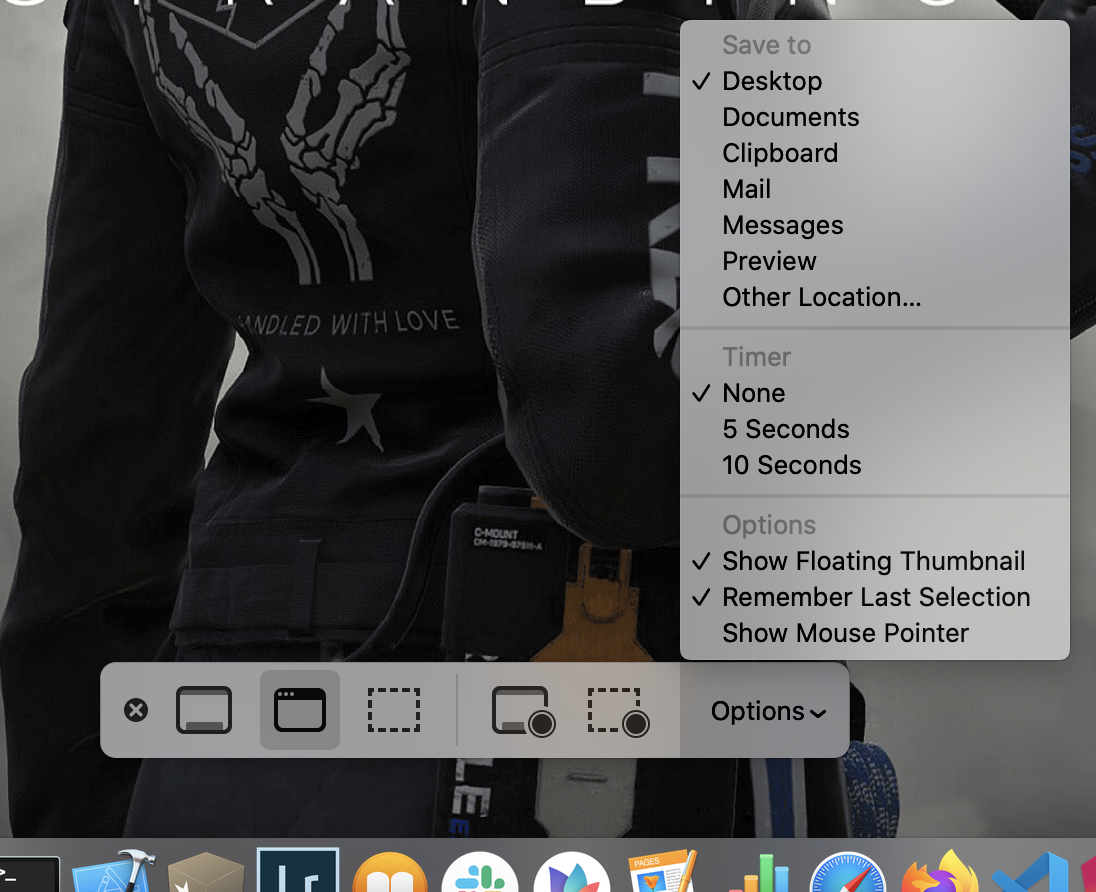
macOS is quite handy on certain things and screen recording is one of them: no third party software needed, by pressing Command + Shift + 5 you will see the following:
You will see 5 buttons listed in a row, which means:
- Capture Entire Screen
- Capture Selected Window
- Capture Selected Portion
- Record Entire Screen
- Record Selected Portion
Select the options you want, then hit the Record button(not showing in the screenshot) on the right side of the Options button.
But notice that the shortcut is only available in macOS Mojave and afterward. So if nothing happened after you press the combined key, we need to use Quick Time Player.
Quick Time Player
Open Quick Time Player, go to File -> New Screen Recording. If the combined key above works then this will brings you the exact same UI.
Here are the steps if the combined key wouldn’t work: https://support.apple.com/guide/quicktime-player/qtp97b08e666/10.4/mac/10.13
Record directly within Unity
This is the method I recommend, it is pretty straightforward and you can export super-scaled video up to 4K or more.
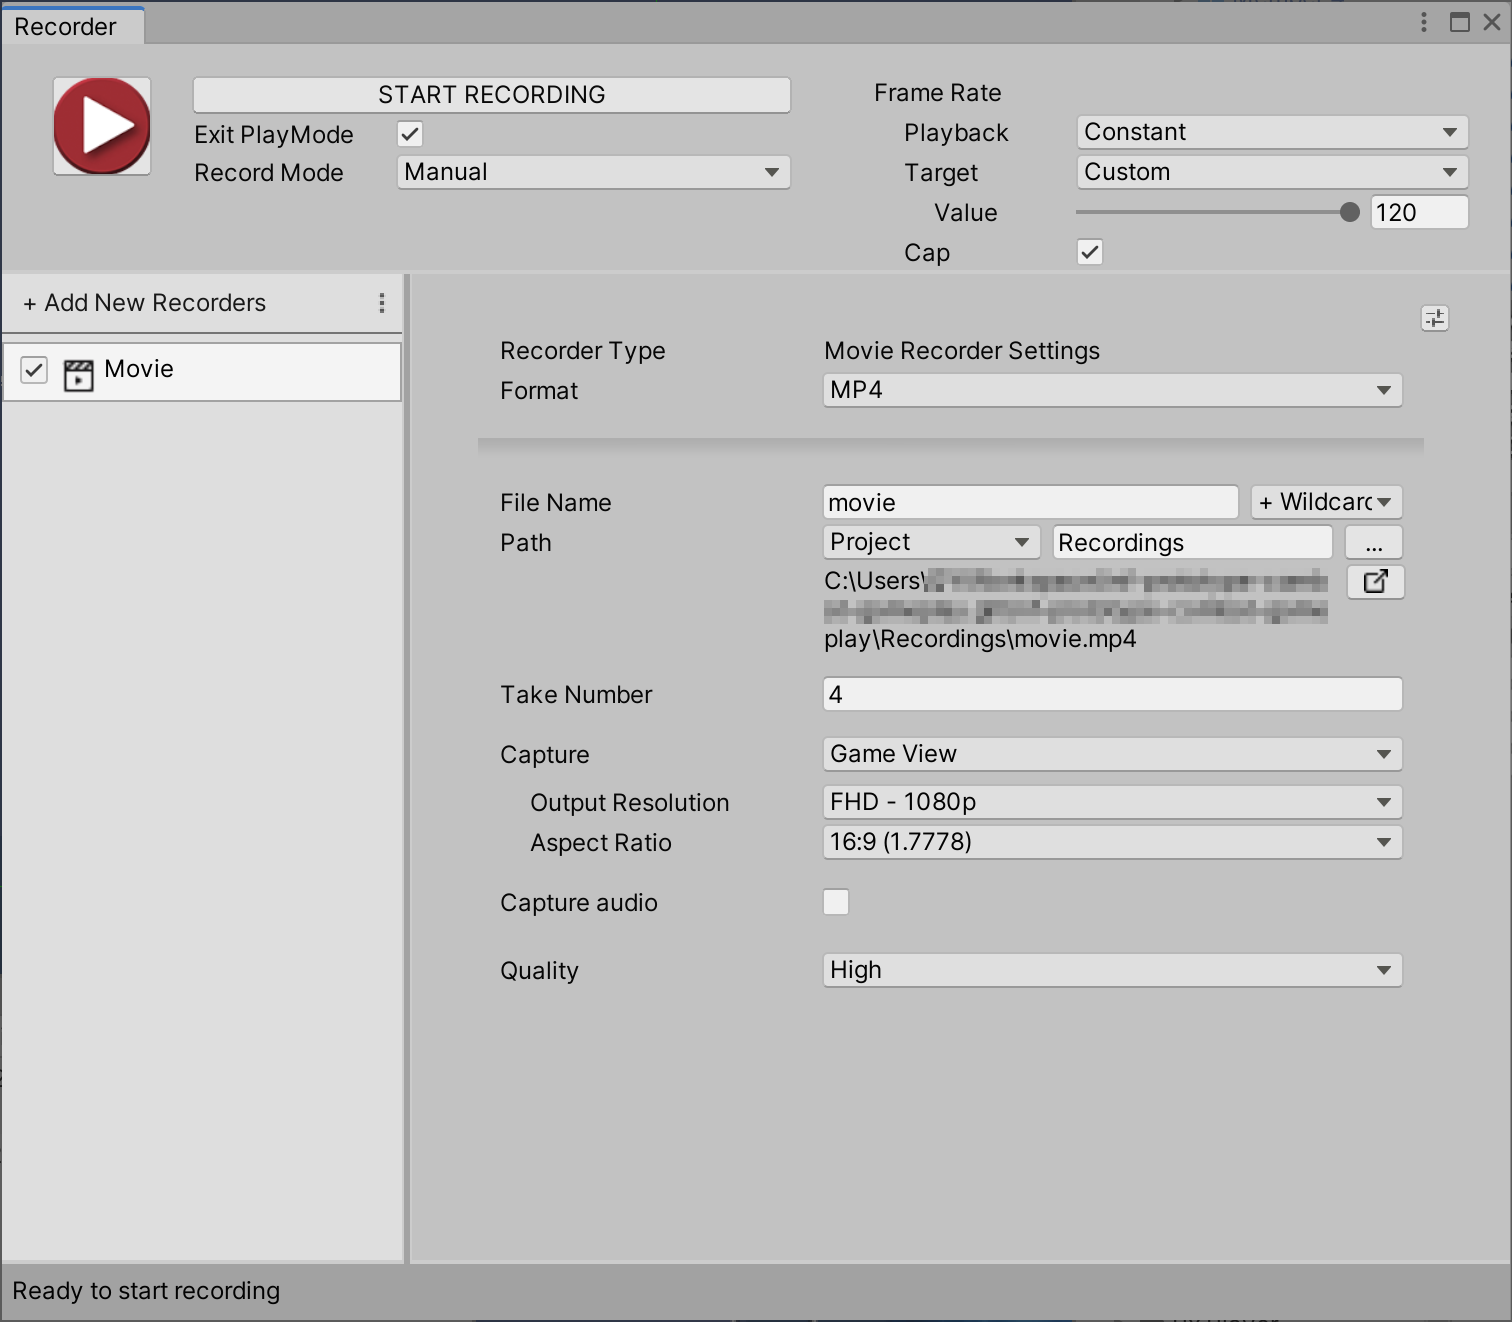
Unity officially released a recording tool to record play mode content.
To get the tool, in Unity go to Window -> Package Manager -> search for Unity Recorder.
Here shows the main UI of the window. You pretty much don’t need to change anything here to record a video. You can put the file name, resolution, framerate as you want here. And it shows you where the recorded video will be.
By clicking the START RECORDING button, the Unity starts play mode, the video will be recorded. When you have done the record, exit the play mode.
Recommended Video Parameters
Framerate
Frame rate (expressed in frames per second or FPS) is the frequency (rate) at which consecutive images called frames to appear on a display. The term applies equally to film and video cameras, computer graphics, and motion capture systems. Frame rate may also be called the frame frequency, and be expressed in hertz. (Source: Wikipedia)
So in a sentence, a video in 60 FPS means that it shows 60 static images by order every second on your screen. The higher the FPS, the more fluid your video will be.

Here is an example shows a comparison of 12 FPS and 30 FPS.
 12 FPS
 30 FPS
Notice that while a higher FPS gives a better experience, it can increase the size of the video file, a lot. You probably don’t want to send a large file to your friend via a network with low connection speed, so in that case, you may want to consider lower framerate.
In conclusion
- For high-quality and videos that may be used with VR headsets, I recommend 60 FPS.
- For lesser quality videos and GIF-like animated sequence, I recommend going with the situation and filesize in mind, anything from 12 to 30.
Resolution
Here it shows the most common resolutions of videos and computer screens. The higher the resolution, the more details it shows.
So depending on the actual usage, you might want to balance because a higher resolution also means that the larger file size, especially you want to send the file to someone else who doesn’t have a good connection.
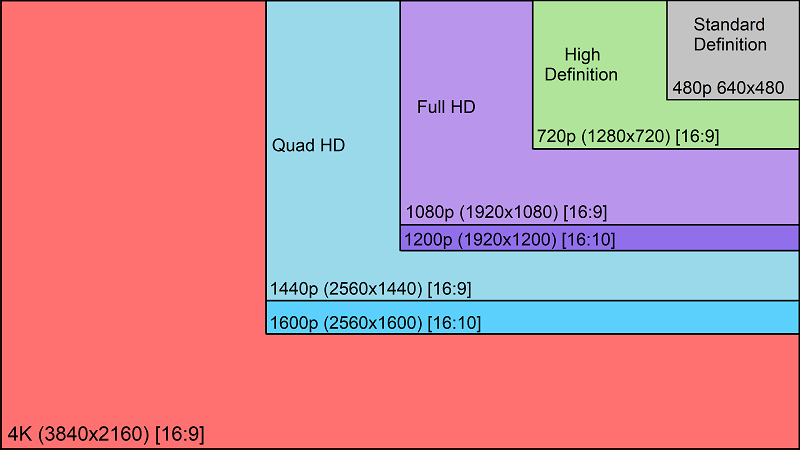
In conclusion
- For high-quality videos, I recommend at least 4K, there are some 8K videos available out there, but this is not common yet.
- For lesser quality video, I recommend going with the situation and filesize in mind, Full HD (1080) might be preferred otherwise regular HD (720).
- For GIF, anything that fits your needs.
Format and Codec
This might be a topic that makes this essay 10 times longer. So we wouldn’t dig this too much here but only provides simple advice on the choice of video format. However, an essay explained in detail about codec and format is provided for people who want to make sure he/she acquires the knowledge.
So in everyday life most probably the video format you will see are MP4, WMV, MOV, MKV, and FLV. In terms of recording a video and to be able to send the video to someone else, you can trust that an mp4 video file can be played well on most of the modern computers. If the software you’re working on provides an option to select the codec, H.264 is recommended.
WMV is a sort of Microsoft thing, so you can trust that a Windows computer with Windows Media Player can play the WMV file. MOV file, which developed by Apple, which can be played with macOS builtin Quick Time Player.
So if you want to learn more about what a codec is, and why MP4 is more a container instead of video format, check the link here: https://www.borrowlenses.com/blog/video-file-formats/
In conclusion For being largely supported across most platforms, I recommend using MP4 (that allows video streaming by the way) with the codec H.264 which is the most commonly supported codec as of today.